
Showing posts with label Organization. Show all posts

DIY magazine holders from Priority Boxes

**Edited 1/15/2014**
This is still the most popular post on my blog!  Crazy!  I am reposting this since it's a goody.  New year and organization is key, right?
Since making this and using it, I have also rotated the box to fit 12x12 paper!  Duh!  I don't know why I didn't think of that in the original post almost three years ago!


**edited 4/3/2013**
Wanted to thank you guys for stopping by, as you view my "most viewed" post!  I've been researching the use of Priority Mail boxes for a couple of years now since I originally posted this and this is what i've found:

Re-using Priority Mail Boxes is illegal when trying to use the box with parcel or media mail shipping.  If you reuse the box and go via Priority Mail is fine.
For already used boxes that aren't going to be used to ship anymore (my own case), personal use is fine.  So for me, I already had these boxes from a previous business that I was doing.  When it stopped, I had all these boxes that I didn't want thrown away.  So I used them to help me organize my magazines.  This type of use is fine.  It's when people turn them inside out or cover them with tape and paper and try to ship cheaper that it's illegal!  Ok now onto the post :)


As i'm organizing my craft space and getting it presentable, I found a dilhema.  What do you do with 5 years worth of Scrapbook magazines?!
I didn't want to throw them out.  They have valuable information inside of them that I frequently refer back to.  So I needed some magazine  holders.  But I wasn't going to pay for them!  They can be expensive when needing 6 or so.  

So instead I did this for free!
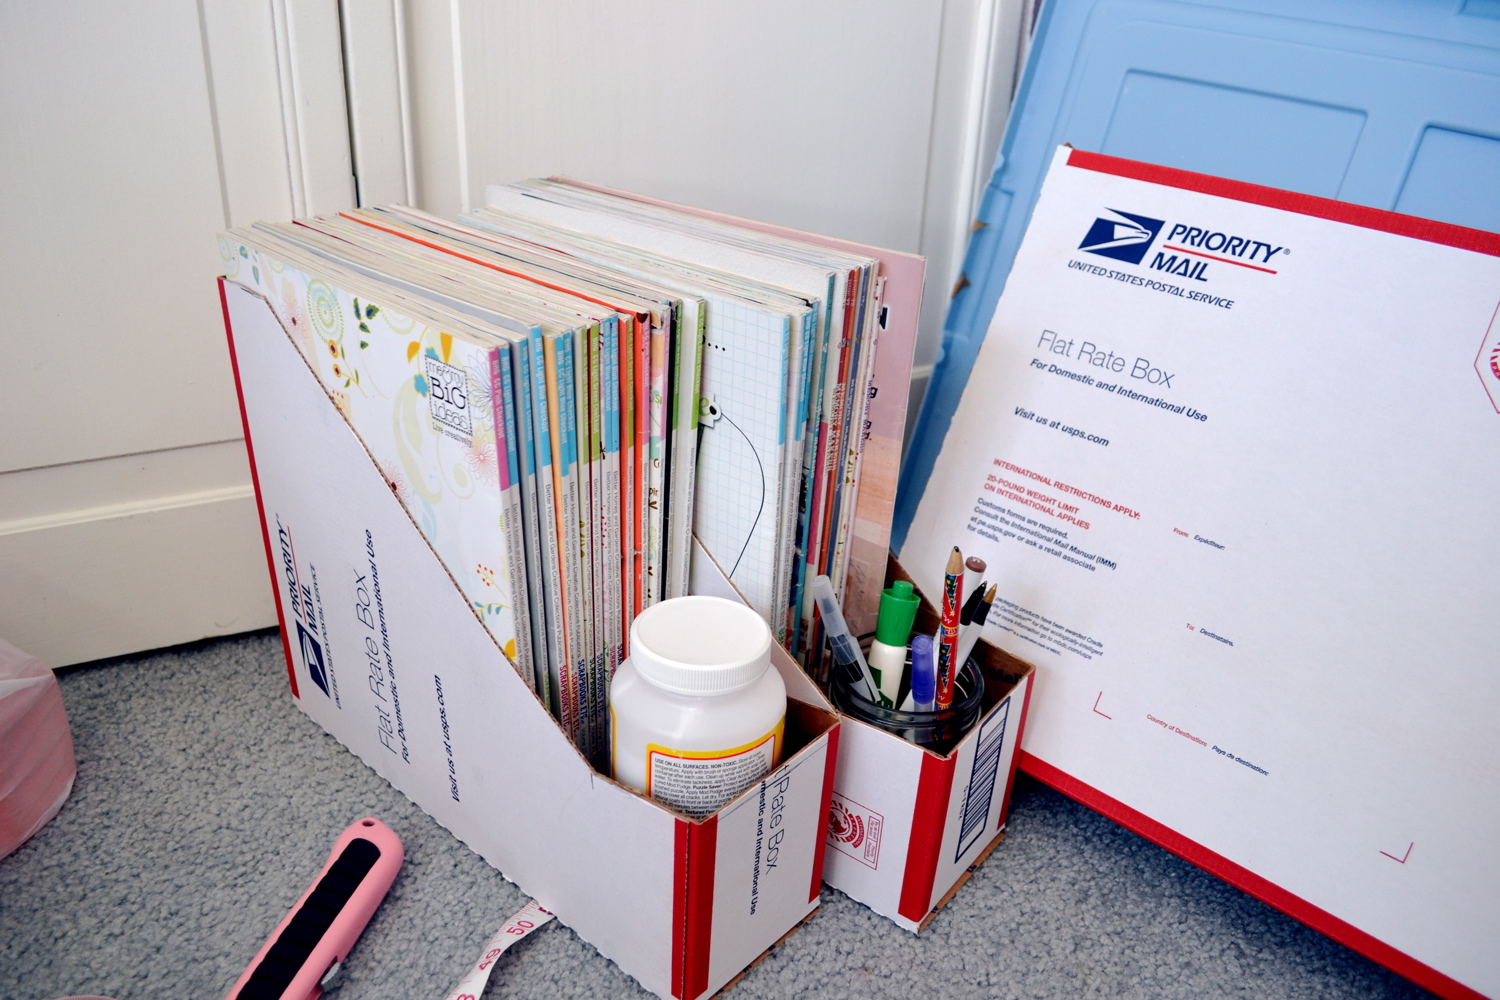

During my de-junking process, I found a box of folded up Priority Mail boxes that I had gotten for free from the post office when I  used to sell and ship items.  But I never ended up using them.
So thus my experiment began.

I assembled a Priority Mail box and got my measuring tape and pen and went to work.

So I took one of the corners that would support an "L" look and measured 4 inches up.

Then I rounded the corners to the sides of the box and measured 4 inches too.

Next from the 4" mark, I measured 2 inches and marked it, making sure I made an intersection with the 4" mark and the 2" mark.  Do that on both sides of the box.


Take the diagonal corner from which you've been working on and do the same thing.
After that, it should look like this.  I circled the intersections too.

Take your measuring tape or ruler and line up the two intersections...

Then you connect them!  Do this on both sides.

Next is the cutting part.  I was NOT cutting them in the picture.  It was all for demo purposes.  These babies are sharp so you be very careful!  Cut along the lines around the box.

Now take them apart...

Flip one over and you've got 2 magazine holders!  If  it were 1/4 inch longer, they could have fit 12 x 12 inch paper!  Oh well...

K I'm loving this!  All my magazines neatly in a row.  There's storage in front too for things!


Ideally, I want them on a shelf on the wall but we aren't there yet.  For now, they are on the shelf in the closet.  I will also paint or modge podge them pretty when I do that.  My OCD side of my brain kept telling me to do that right now but I am FINE with them for now...I need to keep telling myself that!  ha haa.

I hope this helps you get tidy today!
You can order those Priority Boxes for free over at USPS.com
So how do you store magazine or other items that you have a TON of?

I'm linking up to THESE parties!

Craft Room Transformation!


So I'm finally done with my blasted craft room! 
It's been months and months in the making & it is finished!  I started this project in January after we moved in and it's now the end of July.  Wow, it really shouldn't take someone this long!
Well let me show you a sneak peak of what it looks like now:

Before I go into detail, let's take a walk down memory lane of the transformation of my craft room, shall we?

Here we are in January, right after we moved in...yikes!  Just looking at this picture makes me feel overwhelmed!

Over the month I started decluttering and trying to make some order:


Then i got me one of these babies from Costco and made a huge dent!
It went from this:


To this!

Then I dejunked some more and tried to put stuff away.  It was so close! 


Then I stopped.  May came and I got busy with end of the year stuff, then summer came so my room stopped.  But in the meantime, i picked up some more pieces for my room. 

So a few weeks ago, I sat down and went to work!  And here it is:
This is the view you get when you enter the room.


Closet view & costco shelf

Free sewing desk with adorable Bumblebee & Sophie Sewing Machine cover!  They did a great job and I love the fabrics they used!!


Lovely shelf all organized!

More drawer space is awesome & my ribbon rack is a must!  (those cake plates were waiting to be used for something I will be showing you soon ;)  )

My inspirational quotes up on the slanted ceiling.

My closet all orgainzed :)


It feels so good to have a functional room to use now!  Most important things i've found is:
1- everything needs a home!  When it does, then you know where to put it back so you will find it again later!
2- Look in your home for things to use!  I had that dresser in another room!  It's been a great addition!
3- Dejunk!!!  So important!

Anyways, I am so glad that I am done with this project so I can move on to the next one with out feeling guilty ;)  Thanks for stopping by and taking this walk down memory lane with me!

tidy-up tuesdays.


Do you ever have one of those "zones" that just can not stay cleaned?!
I have too many of them in my house.  
So i am dealing with one of them today...the dreaded "kids creative corner"
This is on a good day.  Usually there are papers and markers, crayons and books everywhere.  
I keep pulling my hair out trying to keep up with it!


So what I did was empty out those plastic bins.  Completely.  Everything out!  I then went through the pile, decided whether to keep or trash. For the most part, I trashed because they have too much crap!

I then designated a drawer for each kid.  I put their own crayon box and their own coloring books in it.  They are now responsible for their drawer!

Grabbed a huge trash bag and threw the rest away, and sigh...all clean and organized. 

I have realized that my kids don't need 1000 coloring books, 100's markers, crayons and scissors.  I need to limit what they have so it doesn't over take me!

What supplies do you give your kids when creating?

tidy-up tuesdays: kids creative spaces


All three of my kids love to draw and color.  They could do it for hours.  That part is great.
The crayons, markers and paper all over the table and floor?  That part is not so great.

So i've been looking around for ideas and inspiration because I need a huge dose of it.  One thing i'm considering is giving each child their own plastic bin, complete with coloring books, a set of crayons, a set of markers, and paint supplies.  Each item would be labeled so there would be no mixing and everything would  have a home.  That's what I want to do.  Until then, these images are fun to look at ;)


this one is awesome


What do you do with your kids art supplies?


tidy-up tuesdays.

I finally tackled my dresser.  This dresser sits next to my bed and it is the drop off area.
Such a big mess!

First up, I put up my necklace organizer and earring holder on the wall to put my jewelry in its place!

Then I just cleared the whole top off and started putting things away.  It only took about 20 minutes and look at it now!

ahhhh..so much better!

These ceramic holders were free from my husband's office.  He was left with everything when he came to work.  We found them in the basement.  Perfect for earrings!
 
Here is where I hold my headbands, using 2 mason jars.  I think it is perfect for now.  Ideally I want them stored on the wall somehow but I am working on that...

So there you go!  This project is done and hopefully I can keep it clear from now on ;)

This one of many drop-off zones that I want to tackle!  One down, many to go...
What's your "drop-off" areas in your house?  
Pin It button on image hover