
**Edited 1/15/2014**
This is still the most popular post on my blog! Crazy! I am reposting this since it's a goody. New year and organization is key, right?
Since making this and using it, I have also rotated the box to fit 12x12 paper! Duh! I don't know why I didn't think of that in the original post almost three years ago!
**edited 4/3/2013**
Wanted to thank you guys for stopping by, as you view my "most viewed" post! I've been researching the use of Priority Mail boxes for a couple of years now since I originally posted this and this is what i've found:
Wanted to thank you guys for stopping by, as you view my "most viewed" post! I've been researching the use of Priority Mail boxes for a couple of years now since I originally posted this and this is what i've found:
Re-using Priority Mail Boxes is illegal when trying to use the box with parcel or media mail shipping. If you reuse the box and go via Priority Mail is fine.
For already used boxes that aren't going to be used to ship anymore (my own case), personal use is fine. So for me, I already had these boxes from a previous business that I was doing. When it stopped, I had all these boxes that I didn't want thrown away. So I used them to help me organize my magazines. This type of use is fine. It's when people turn them inside out or cover them with tape and paper and try to ship cheaper that it's illegal! Ok now onto the post :)
As i'm organizing my craft space and getting it presentable, I found a dilhema. What do you do with 5 years worth of Scrapbook magazines?!
I didn't want to throw them out. They have valuable information inside of them that I frequently refer back to. So I needed some magazine holders. But I wasn't going to pay for them! They can be expensive when needing 6 or so.
So instead I did this for free!
During my de-junking process, I found a box of folded up Priority Mail boxes that I had gotten for free from the post office when I used to sell and ship items. But I never ended up using them.
So thus my experiment began.
I assembled a Priority Mail box and got my measuring tape and pen and went to work.

So I took one of the corners that would support an "L" look and measured 4 inches up.

Then I rounded the corners to the sides of the box and measured 4 inches too.

Next from the 4" mark, I measured 2 inches and marked it, making sure I made an intersection with the 4" mark and the 2" mark. Do that on both sides of the box.


Take the diagonal corner from which you've been working on and do the same thing.
After that, it should look like this. I circled the intersections too.

Take your measuring tape or ruler and line up the two intersections...

Then you connect them! Do this on both sides.

Next is the cutting part. I was NOT cutting them in the picture. It was all for demo purposes. These babies are sharp so you be very careful! Cut along the lines around the box.

Now take them apart...

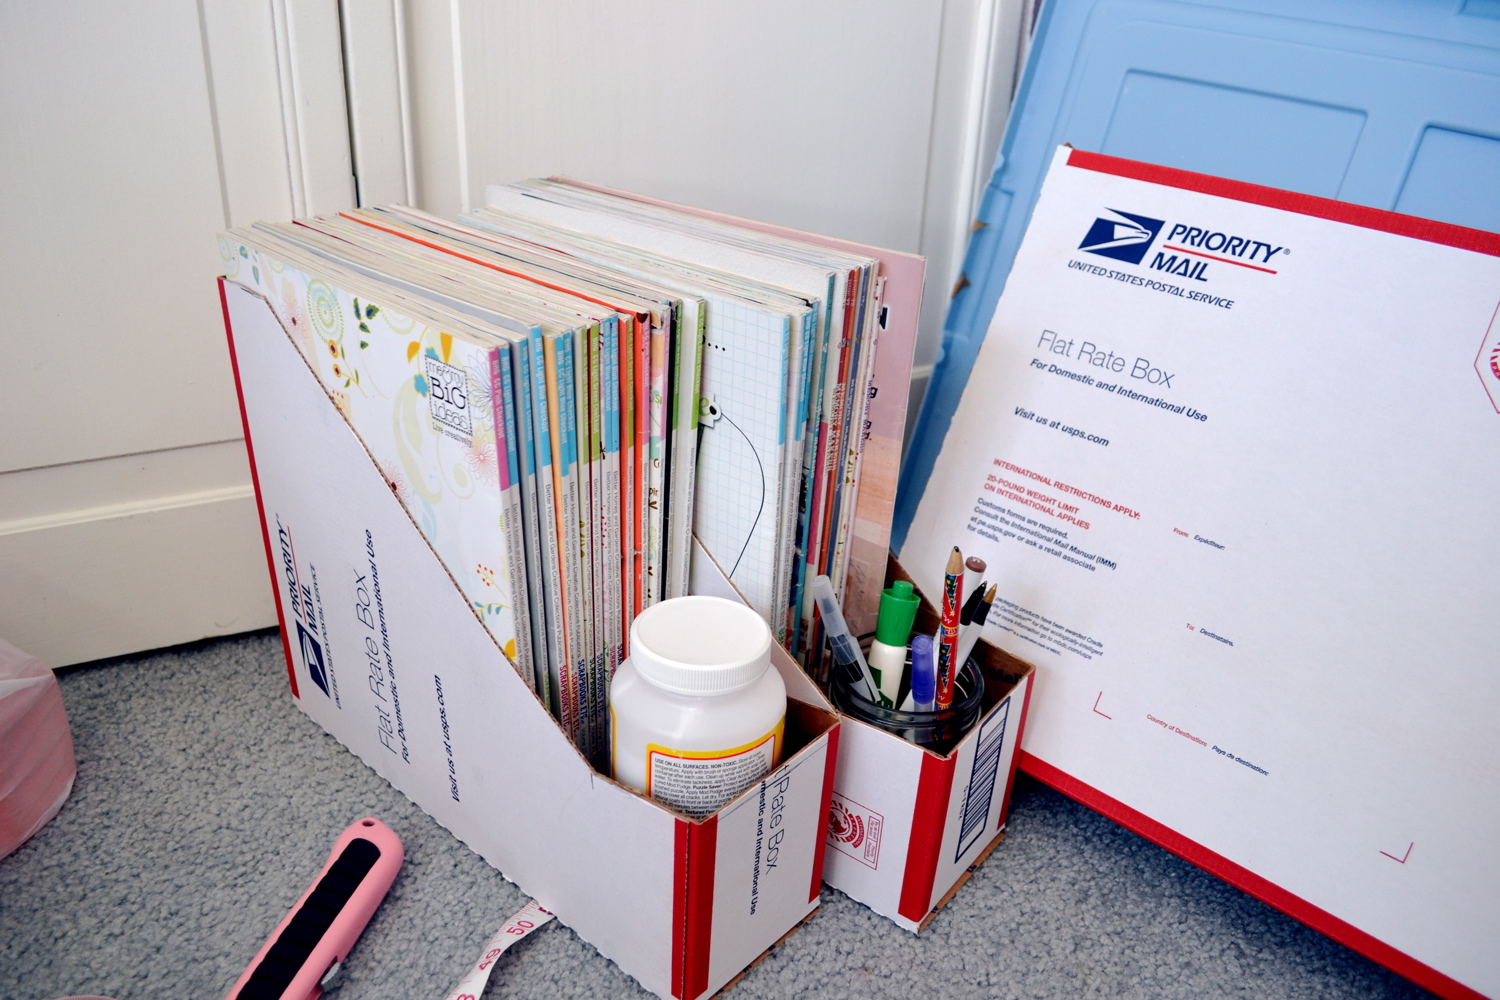
Flip one over and you've got 2 magazine holders! If it were 1/4 inch longer, they could have fit 12 x 12 inch paper! Oh well...

K I'm loving this! All my magazines neatly in a row. There's storage in front too for things!


Ideally, I want them on a shelf on the wall but we aren't there yet. For now, they are on the shelf in the closet. I will also paint or modge podge them pretty when I do that. My OCD side of my brain kept telling me to do that right now but I am FINE with them for now...I need to keep telling myself that! ha haa.

I hope this helps you get tidy today!
You can order those Priority Boxes for free over at USPS.com
So how do you store magazine or other items that you have a TON of?
I'm linking up to THESE parties!
33 comments:
I have a big package of those boxes, too! Smart idea . . . I'll be trying it out if I can ever get up the motivation to straighten up my craft room :-/
Rachel @ Maybe Matilda
I just did this and now these boxes are covered in craft fabric and are EVERY WHERE! book cases, under sinks, pantry,craft room of course, linen closet and in my bed room! They fit all of my curling irons and flat irons neatly under my sink!
What a great idea! And I love the thought of adding fabric or scrapbook paper. Love!
Awesome idea! I have a whole bunch of these boxes from my ebay days that are not flat rate and this is what I am going to use them for!
Thanks!
Great idea!!! Perfect size!
Fantastic idea, now I just need to get some of those boxes!
Fabulous idea! Those boxes are really sturdy too!
Yay! That's just genius! Way to go and thanks for sharing. I too have a TON of these and the great thing is it's soooo easy to get more!
I <3 organizing!! These are great and thrifty!
Thanks so much for linking to "20 Below Thursday"! :)
That is a really clever idea! I wish we had those boxes :) Sadly our post offices charge you a bundle for boxes here. They look like the perfect size for your mags.
You can also put some paper on them to make them more decorative.
im totally doing this for my note books too.
That is so cute! I did this with cereal boxes. I love getting something for free or close to it.
Thanks for sharing over at Tuesday Tell All.
-Melissa
MyCraftieLife.Blogspot.com
Great idea! I need to do some major organizing! Thanks for the great idea!
Cheap and easy, I like it! :-) Can't wait to see how you paint them. Thanks for linking it up!
what a great idea!
i have a gazillion magazines too!
thanks for linking up to the SPRING FLING!
kellie
great idea. we all have some of those AND they are very sturdy. i need all the organizing tips i can get! thanks for linking up to Sister Sunday
Amy
www.SistersoftheWildWest.blogspot.com
So cool! I need magazine holders to but always skip by them. This is a great idea, thanks for sharing!
what a great idea! Thanks so much for linking this up to our Wicked Awesome Wednesday link party!
Lyssa! THese are amazing, what an ingenius idea! Sooo cool. I will be featuring you tomorrow on SJ so stop by and say, "Hi"!
xoxo
Halsey
WONDERFUL IDEA!!!!! I'll get the hubs and his box cutter in action this weekend!
This is so brilliant! I'm going to do this ASAP! Such a WONDERFUL idea!!
I would love for you to link up at my Make it for Less Monday's at http://simplycadence.blogspot.com
What a great job!
Neat & thrifty idea!! Happy to see all your creative ideas linked up last week at my K.I.S.S. blog bash. Looking forward to seeing what great project you share this week, remember the link is open until tonight @ midnight {CST}.
Drop by The Tattered Tag
Ah! The perfect solution!! I've seen this done with cereal boxes and have even tried it, but the boxes are just too weak. I'll have to find some priority boxes and do this! Thanks so much for posting this! :)
very clever idea, I love it! Just to give you a heads up, reusing USPS mailing boxes and envelopes is illegal. It's kind of ridiculous, if you ask me, but I thought you should know in case you haven't heard that yet :) I used to reuse Priority envelopes by turning them inside out and re-taping, until a post office worker noticed that and said I could be charged with misuse of USPS property. Don't know how often that happens in reality though :)
Also just as a note, picking up a bunch of unused boxes from the post office for this project is also illegal. They are only allowed to be taken if you are going to mail them. They are for shipping only, so make sure to recycle used (mailed) ones instead!
Do you have a good suggestion for another kind of box to use? I'm not comfortable using boxes that someone else paid for but I do really love this idea.
Super fabulous and frugal idea! Got the wheels in my head turning for the other size boxes. Heard of folks using cereal boxes for this but I like this idea so much better. Thanks for the tutorial.
I'm sure that's what the USPS meant for these to be used for.
Hi! Just wanted to let you know I featured this post on a small DIY craft storage roundup on my blog. It's a great project, and I can't wait to try it!
www.craftingsanity.com
SO these are completely FREE?? Seems too good to be true!
@Jessica,
I already had these boxes left over from a previous business. They can be obtained for free for that type of use. They probably don't encourage getting them just for this purpose. Like I stated above, I already had these on hand. I didn't want to just throw them away so I reused them :)
You can also use this to make a File Folder Holder. It's skinny, but holds several files and hanging folders.
Post a Comment